Pages

Friday, March 28, 2014

Finishing the Celtic Inlay

SO next steps were to route the cavity for the inlay, glue it in using 5 minute epoxy mixed with lamp black and sand it smooth. Sound simple and it actually is not too bad to do.. Using a 2:1 pantograph helps as the movements of the dremel tool are more controlled.

There are so many little cavities in this inlay that no matter what you end up chipping out some of them as you can see on the left in one of the photos but that is what the lamp black is there to fix :-)

Pantograph set up

All routed

Glued in

Sanded smooth


Thursday, March 27, 2014

Cutting Shell

Rick's tenor guitar will have a Celtic knot inlay on the peghead. Tonight I cut that out & got ready to route the cavity in the Ebony peghead overlay.

I used a finer jeweller's blade than on previous inlays and that seemed to work better.

For routing the cavity I'll use the Pantograph I previously made and a twice life size pattern. I've done a test and it works well.. I do the real routing tomorrow.

Pattern laid out and ready to cut

And cut

Twice size pattern for the pantograph
I should say the twice life size pattern was made using the "big print" program from www.woodgears.ca, the pantograph idea also came from there.

Wednesday, March 26, 2014

Making Fretboards

Not many process pictures but I just finished the two fretboards for the tenor and parlour guitars.. 

One for the Parlour in Wenge with Paua shell bar fret markers and bound with the same binding as the guitar.

One for the tenor in Ebony with gold Mother of Pearl fret dots, also bound in maple like the guitar..

They still need to have the frets put in but I might wait for a bit on that as I am sort of into cutting pearl not I might cut the gold MOP celtic knot inlay for the tenor's headstock.

My little rig for cutting the slots for the bar fret markers

Yes I missed by about 1/32" the slots are 1/16"

Bound and ready for frets

Different angle
Completed Tenor Fretboard

And again the artistic Angle

The two together


Friday, March 21, 2014

Finishing the Rough Necks

Scarf Joints are done and now it's time to cut truss rod slots and glue up the heel blocks. Truss rod slots are done as stopped routes on a router table. The heel block glue up is a bit of a tedious process with a 5 piece neck, the lamination layers must line up 100% front & back otherwise things will look off when the heel is carved.

Both operations are done and next is some fingerboard work.

Truss rod slot cut, note the tape on the router table to
mark the edge of the router bit for the stopped cut

Both Tenor & Parlour necks done

gluing the last block on the heel, each block is glued on individually
so they can be exactly aligned

Two rough necks

Tuesday, March 18, 2014

Starting on the Necks

OK as you might remember some time ago I laminated up the 5 piece necks for both guitars so now it is time to start making the straight stick into a neck..

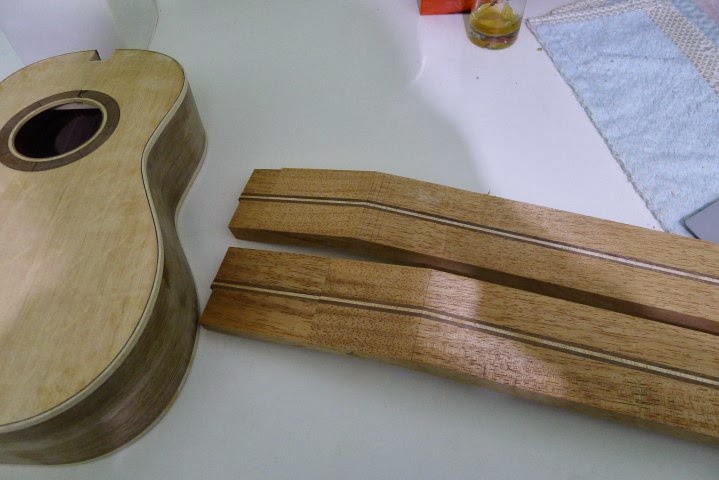
First step is to cut & glue the scarf joint for the peghead. The cut is first made on the band saw then cleaned up with a hand plane before gluing back on to the remainder of the neck. Angle of the joint is 14 degrees.

Many people do this cut with some sort of jig on a table saw but in the interest of space and not having to store yet another jig this is a quick and simple method.

Also many people have elaborate gluing jigs to prevent the joint from slipping when clamping pressure is applied. I find some binding tale and a bit of care is all that is really needed.

Rough joint from the band saw

Cleaned up with a hand plane

Both Tenor and Parlour necks with the scarf joints clamped

The result, you can slide the cut piece back when gluing to
reduce the amount of thickness work with the plane
 you need to do after the fact

Different angle

Joints hand planed smooth and getting close to final peghead
thickness. The veneers need to be accounted for and then
the pegheads planed to final thickness. This also establishes
the final nut position

And the other angle again

Sunday, March 16, 2014

Busy Weekend

OK done, the Parlour is now caught up to the Tenor, so I can put away all the body jigs & moulds and get on with making necks..

This weekend I  carve to top braces and finished voicing the top, glued on the back & top, cut the binding channels and the channel for the top Abalone purfling and got all the bindings & purfling installed.. I was a bit concerned how the Wenge would route as it seem brittle but it was fine..

Still lots of finish sanding to do on both bodies but that can wait until later...

All in all a productive weekend and I'm officially in love with my new binding router jig.. works so darn well..

I'm also really happy with how the binding came out on the Parlour the Abalone looks great and not too gaudy..

Very happy with this look

No Abalone on the back

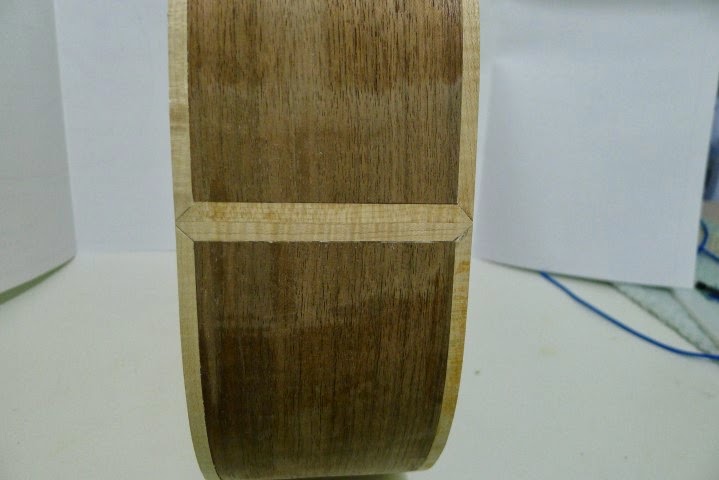
End wedge

Top view

Both now waiting for necks


Thursday, March 13, 2014

Tenor & Parlour Work

I'm trying to get the Parlour guitar caught up to the Tenor... Almost there..

The Bindings are on the tenor and they turned out very nice..

Top View

Only the top has the back purfling line to separate the binding & top
And from the side, simple & nice

Simple end wedge

Now for the parlour the end blocks are on, the kerfing is done the top & back are braced and the back has the braces carved and is ready to go on the top.. Just need to carve the top braces and get it voiced and  then I can radius the sides and get the box closed hopefully in the next day or two..

Then on with the necks..

Rough back bracing

Bridge patch last of the top bracing

More clamps

Braces shaped & back label on 


Tuesday, March 11, 2014

Binding Channels

Undoubtedly one of the more stressful parts of building a guitar taking a 10,000 RPM router to a guitar body, quite a bit can go wrong.. If you've followed this blog you've seen a couple of ways I've cut binding channels in the past.. All worked with varying degrees of stress and some variance in accuracy.. Most of the jigs I used were chosen to accommodate having a very small space for a shop. I just don't have room for a large parallel arm fleishman/williams-style jig.. I've been looking at the LMI or the Stewmac jig for some time and when LMI updated their design I did some thinking and decided that looked the best..

It is still a compact jig that I can store away in a cupboard when not in use and it works like a charm..

Setup is easy, adjustment straight forward and it works, despite screwing up the install of the top bindings and having to cut them off (with the jig) and even that when well..

Just pay attention to the getting the guitar level in the carrier.

I am far less stressed about cutting binding channels now that I have this jig.

The only change I had to make was a slightly different assembly of the carrier since I am doing a small bodied guitar..

Carrier assembled in a "non-standard" way

The results

Mounted to my work table

Friday, March 7, 2014

Closed the Box on Rick's Tenor

So now it looks like a guitar, or at least 1/2 a guitar...

Has a light seal coat of shellac and ready for the binding channels to be cut.. typically described as a high pucker factor task..

I'll be using a new stationary binding jig from LMI that seems like a good and relatively safe way to do this..


Thursday, March 6, 2014

Voicing the Top

So voicing the top to me means carving the braces down until I get some sort of tap tone on the top that is musical and has a ring and sustain to it.. Pretty subjective really, there are other means that are more mechanical and use various scientific equipment but I really don't have the interest in learning those or buying yet more equipment.. The method I use has been used for a very long time and can be very successful.


Top with rough bracing

Carved and scanded braces

Back braces also sanded

Top and rest of body ready to be closed up.


Tuesday, March 4, 2014

Sharpening Day

One of the slightly less fun days in instrument building.. :-)

I'm just about to carve the top braces of Rick's Tenor so a good time to take a break and sharpen a bunch of tools...

All my favourite chisels including my 3/4" Hirsch crank neck one that is great for brace carving..


I also cleaned up the Stanley Sweetheart Socket chisels and Vertias Bench chisels so those are ready to go for carving the neck. Also for carving the neck, I tuned up my spokeshave so I'm ready when the time comes..

Lastly I have a nice set of detail chisels that frankly were looking like shit so I took some time and did some major work getting them back in shape..


I've tried lots of methods for sharpening, water stones, diamond stones etc but the way I have settled on using most of the time is just varying grits of sandpaper 600, 1000, 2000 and a very fine polishing grit.. just the easiest and quickest way to do this.. My version of the "scary sharp" system.. It works great and is cheap and quick.. Anyone want to buy some Japanese water stones???